Masking
rakaia supports the import and overlay of mask arrays that represent segmented objects over canvas images. These masks are often outputs of processing pipelines for multiplexed imaging technologies and can represent structures such as cells and tissues, or more complex annotations.
Mask import/formatting
The data import collapsible sidebar for rakaia has a drag and drop input components where masks can be uploaded:
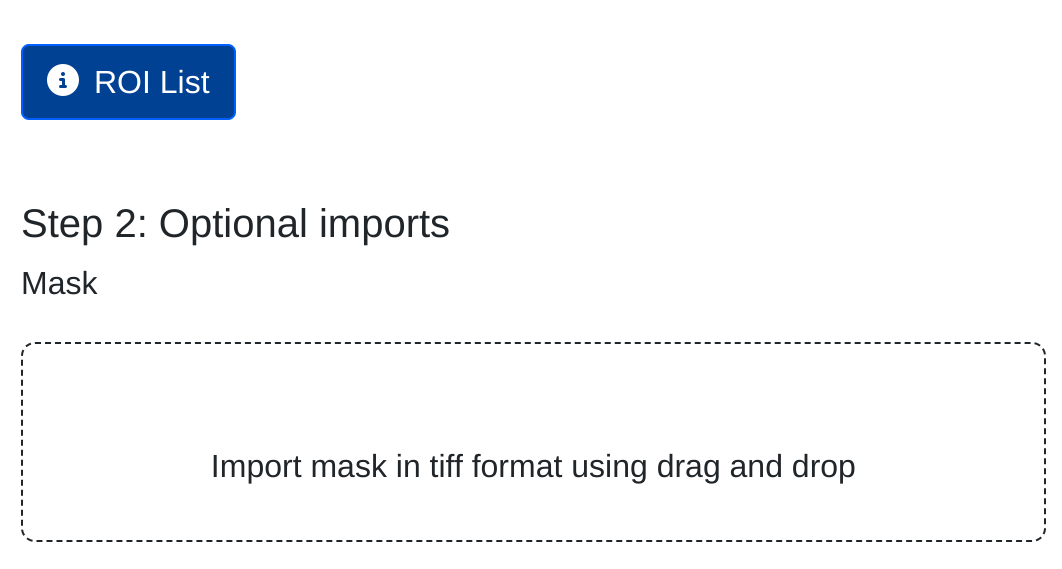
Masks can be uploaded individually or in bulk. Individual uploads will prompt a modal popup where the specific mask name can be set. For bulk uploads, the basename of the file will set the internal mask name that is shown in the dropdown menu. Users should ensure that for bulk uploads, each mask has a unique filename that corresponds to an ROI name (see below in Mask matching heuristics)
Mask formatting
Masks should be imported as single-channel greyscale tiffs where each tiff represents a mask for a specific ROI. The naming convention of masks can be user-derived, and partial and exact name match of mask tiffs will allow for rakaia to auto-identify the mask associated with an ROI. See more under Mask matching heuristics.
The mask itself should be a 2D array of integer values starting at 1, where each integer represents a unique object in the mask (i.e. a cell). Conventionally, each array value that has the same integer value corresponds to a pixel that represents that object (e.g. All of the array values with 1 represent a cell with ID 1). Areas of the mask without an object should have values of 0.
Mask overlay & blending
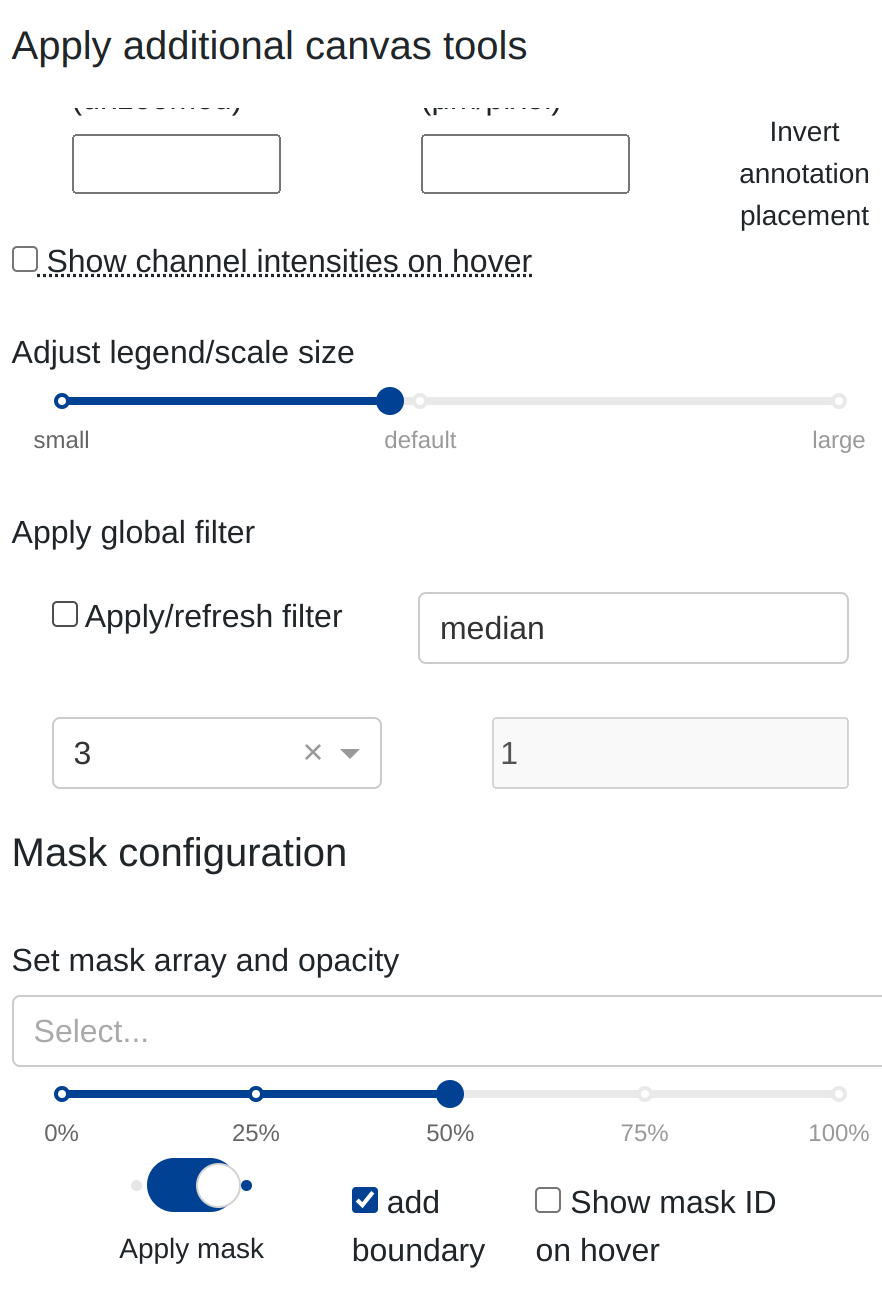
Masks can be selected and overlaid on top of a canvas under the Configure, annotate, measure, & more collapsible sidebar under the Mask configuration space:
When a mask is selected, rakaia will verify the dimensions of the mask against the current ROI. If the dimensions to not align, the mask is not applied and the user will receive an alert message detailing the incompatibility.
Selecting a mask from the dropdown menu and then toggling Apply mask will project the mask on top of the blended canvas with the adjustable opacity relative to the underlying blend:
By default, the object boundary of each segment in the image will also be projected on top of the blend. This allows the user to adjust the opacity of the interior of each segmented object while retaining the boundaries of the objects. This option can be turned off as is necessary.
Mask appearance & opacity
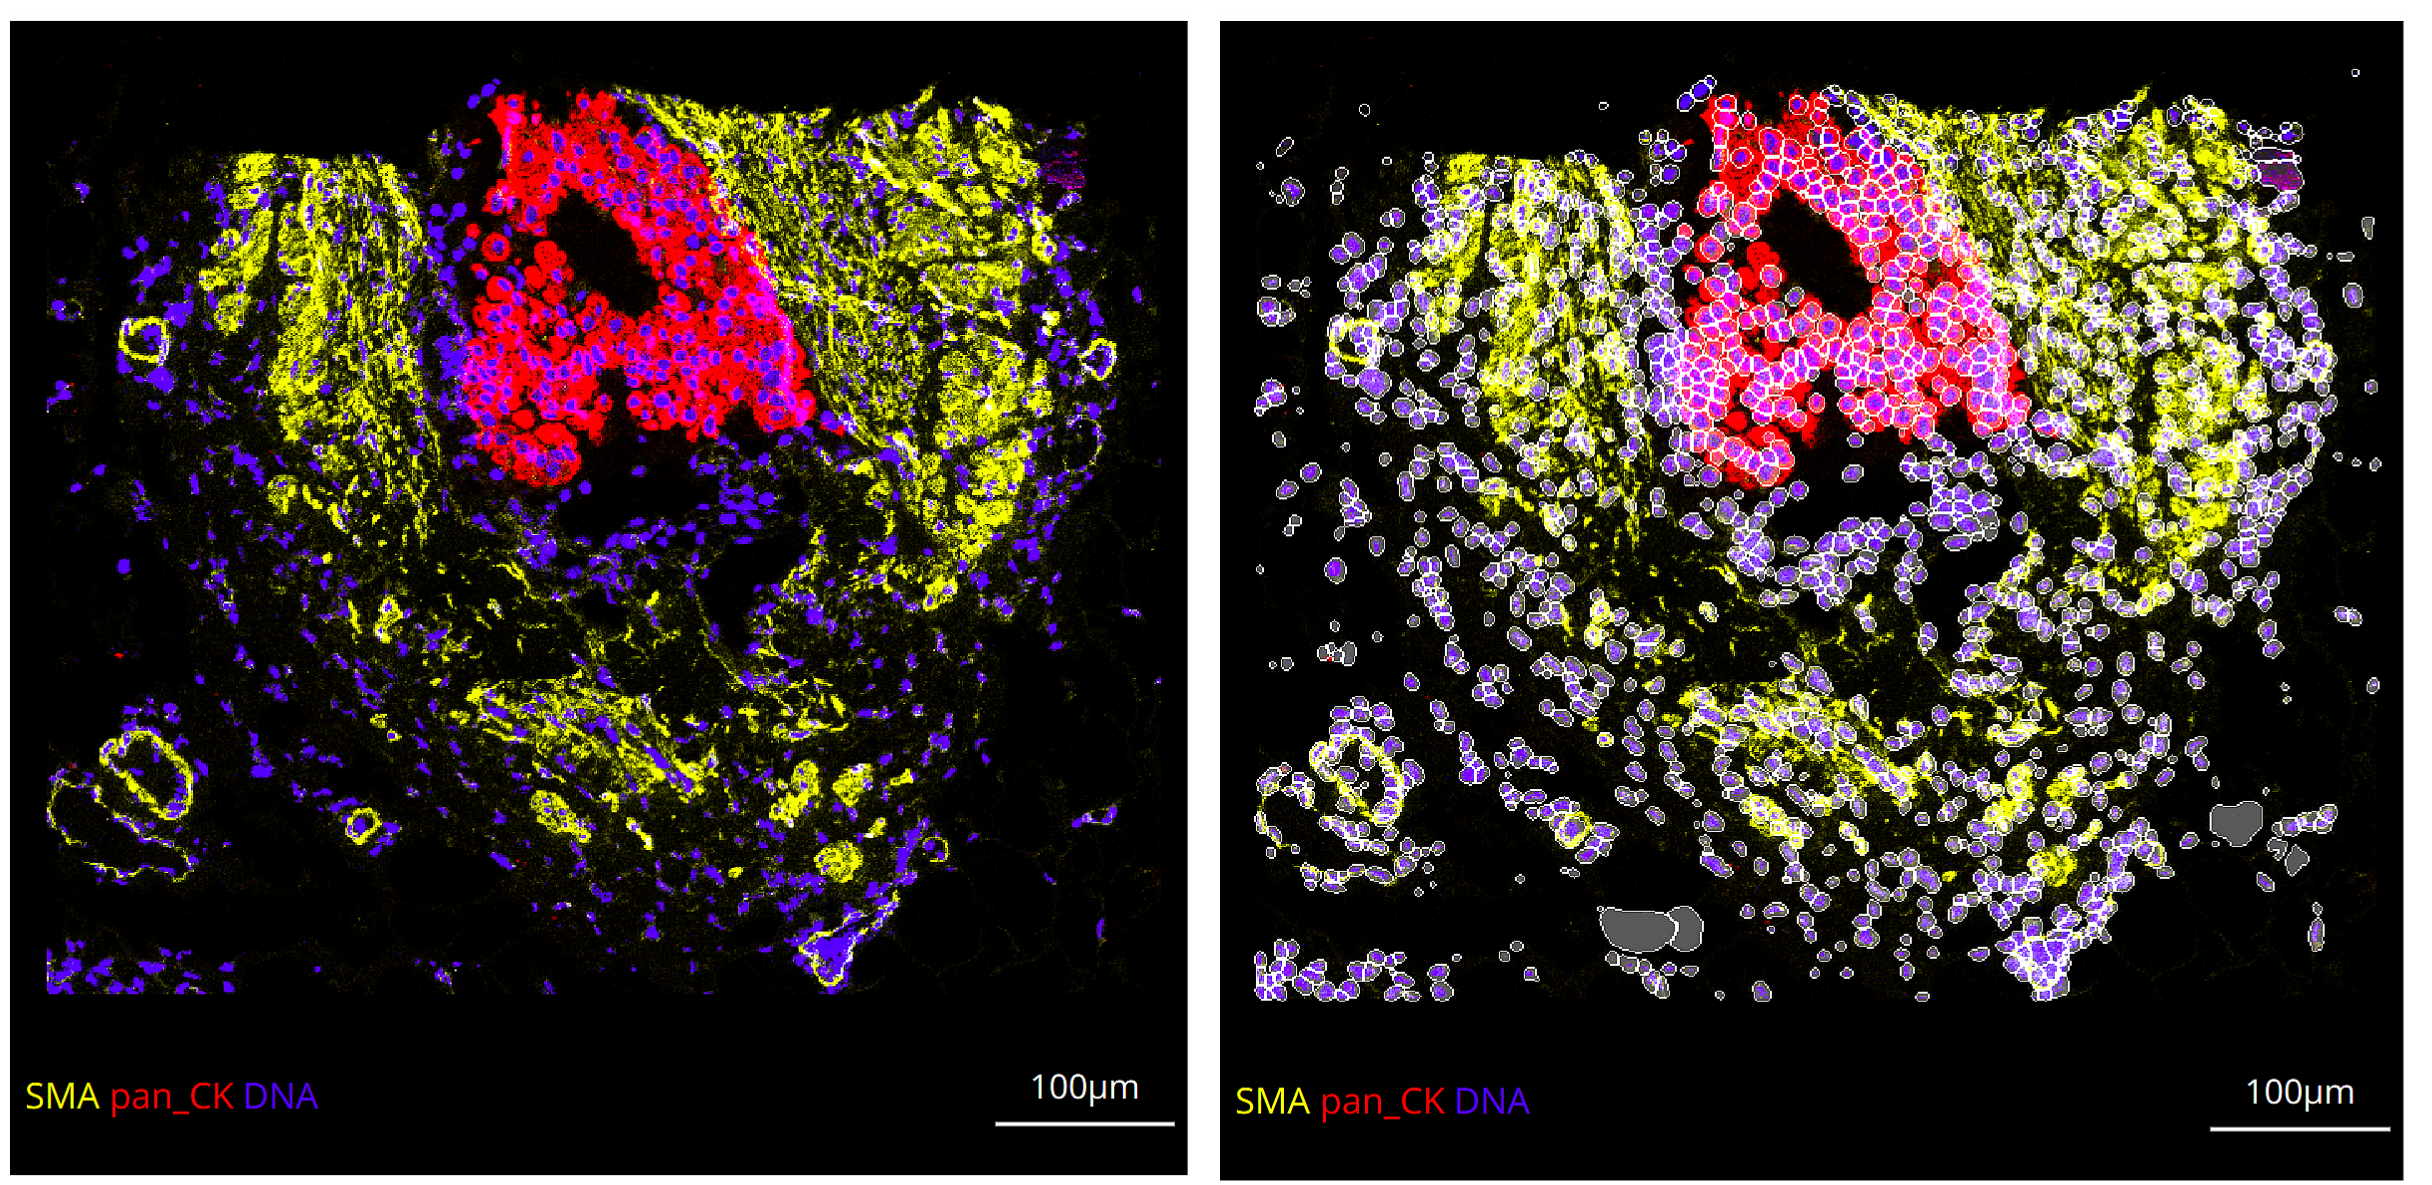
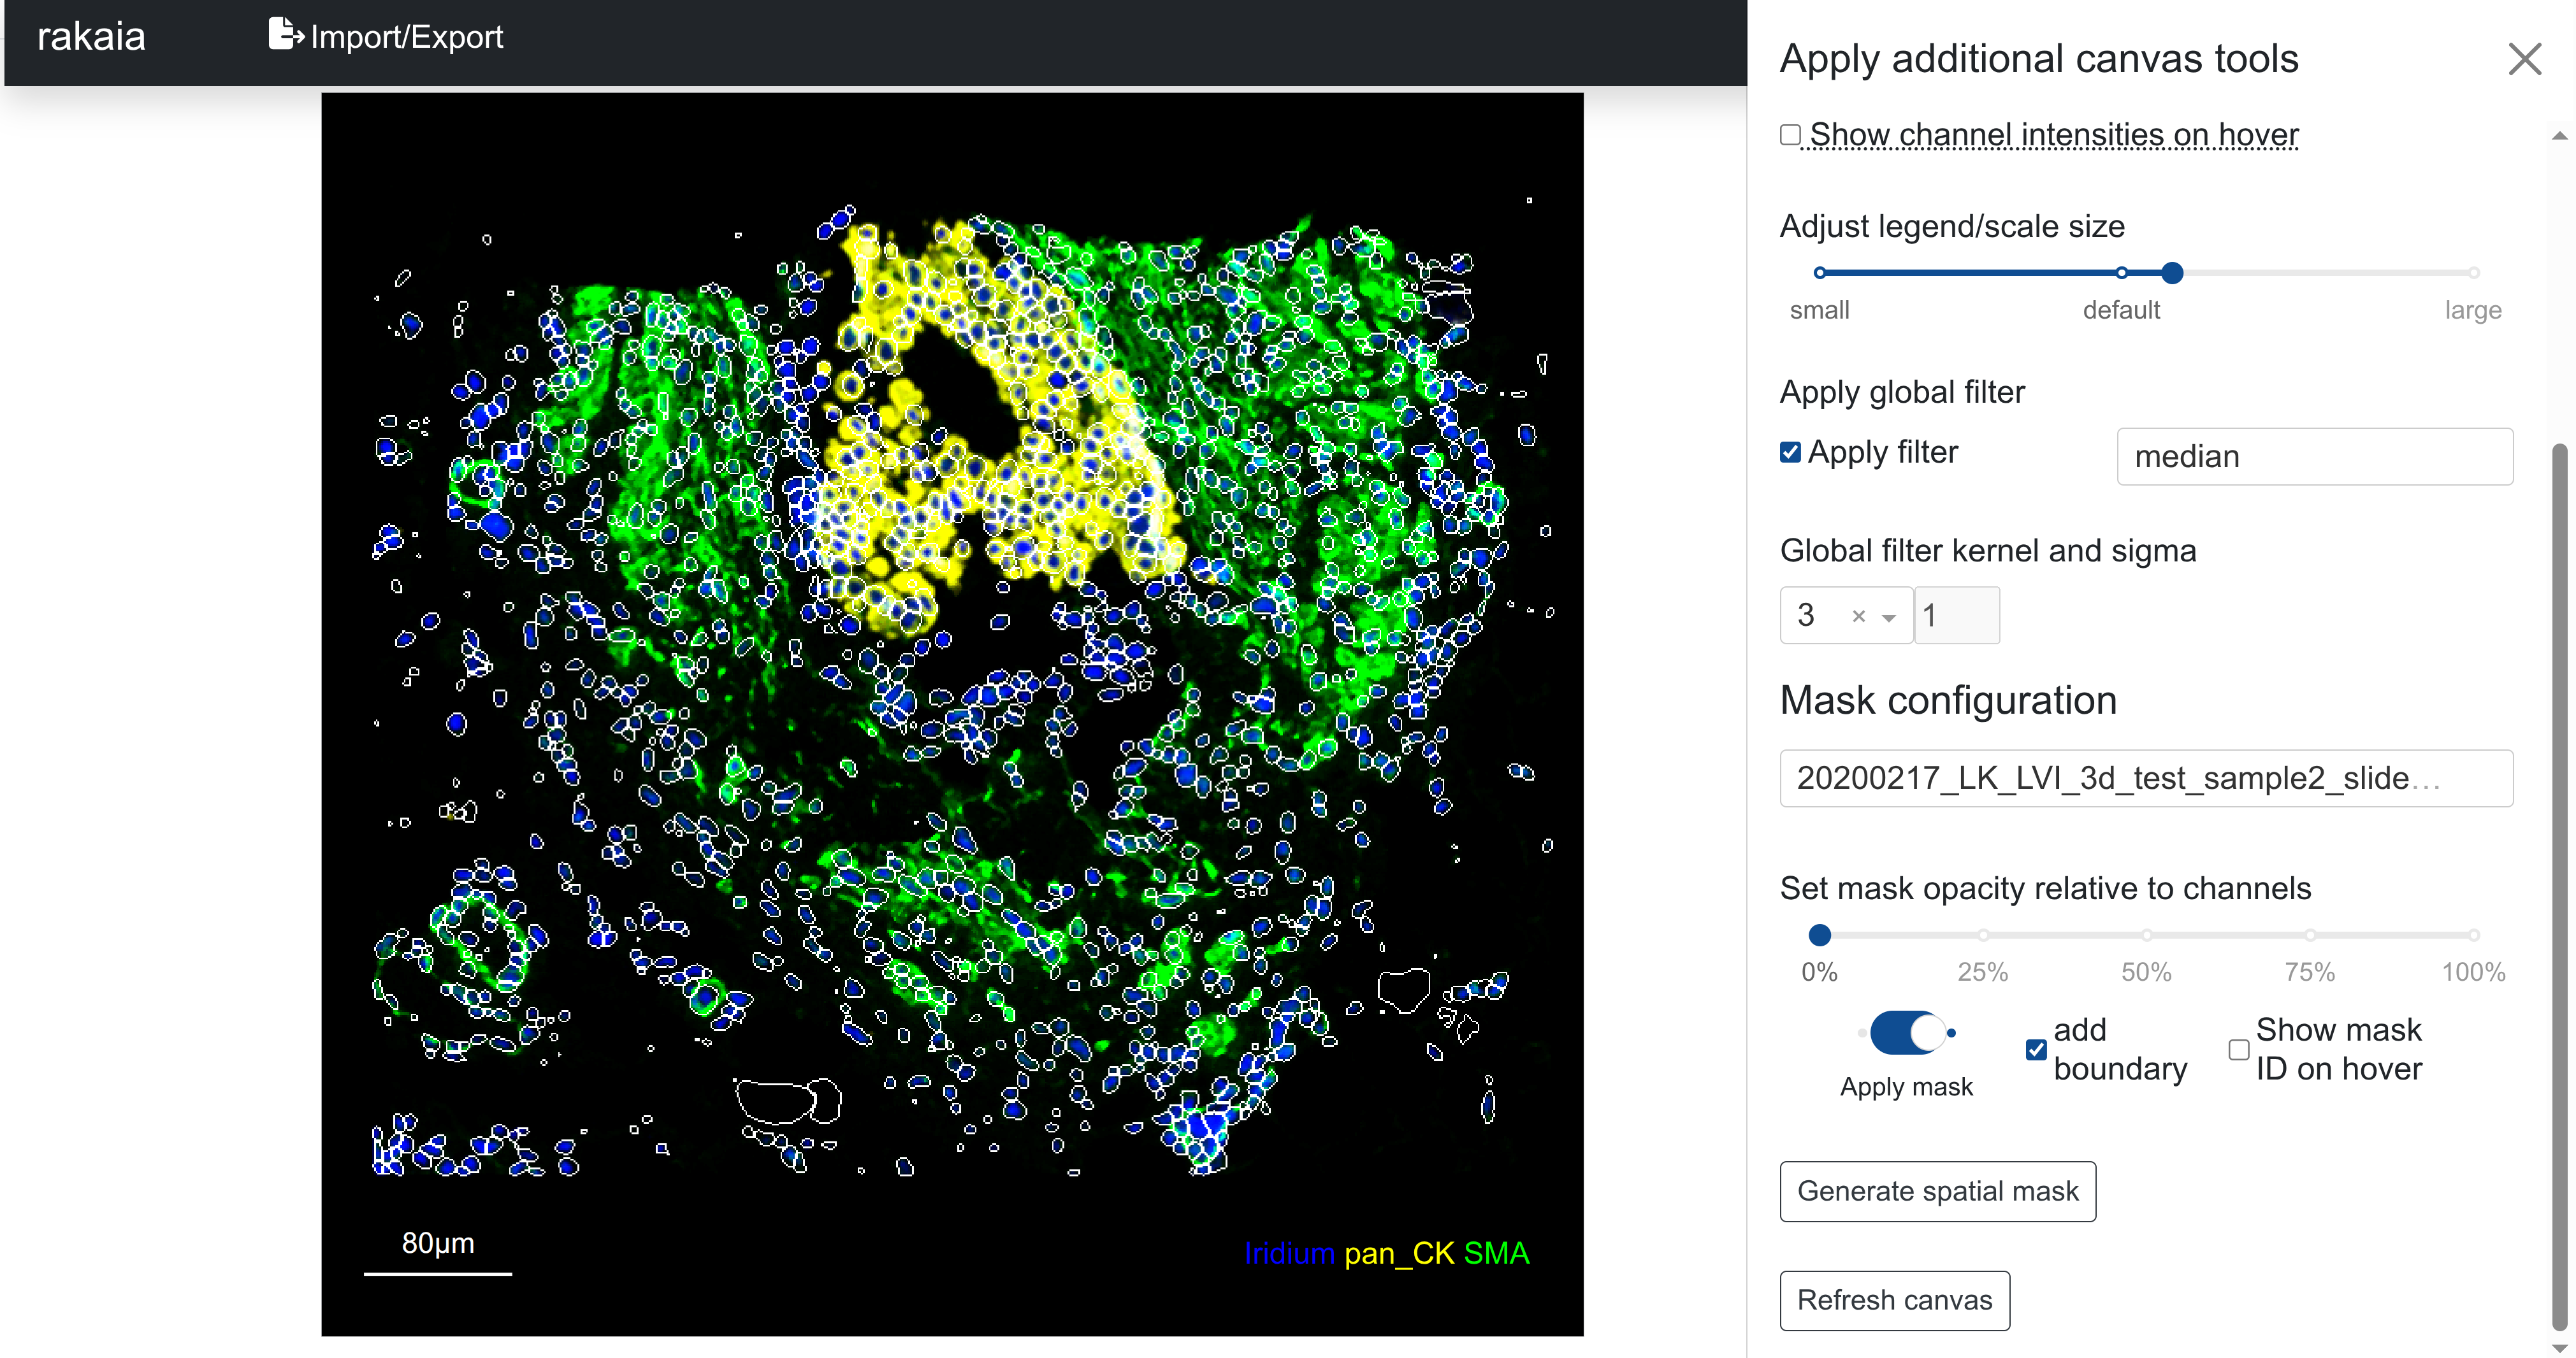
The opacity of the mask relative to the underlying blend can be adjusted using the range slider under the mask selection dropdown. An opacity of 0 sets the mask fully transparent, whereas a value of 100 sets the mask to fully white intensity. This is demonstrated below with the cell boundaries applied to indicate the object placement; the first image uses opacity of 0, so only segmented cell boundaries are visible over the blend:
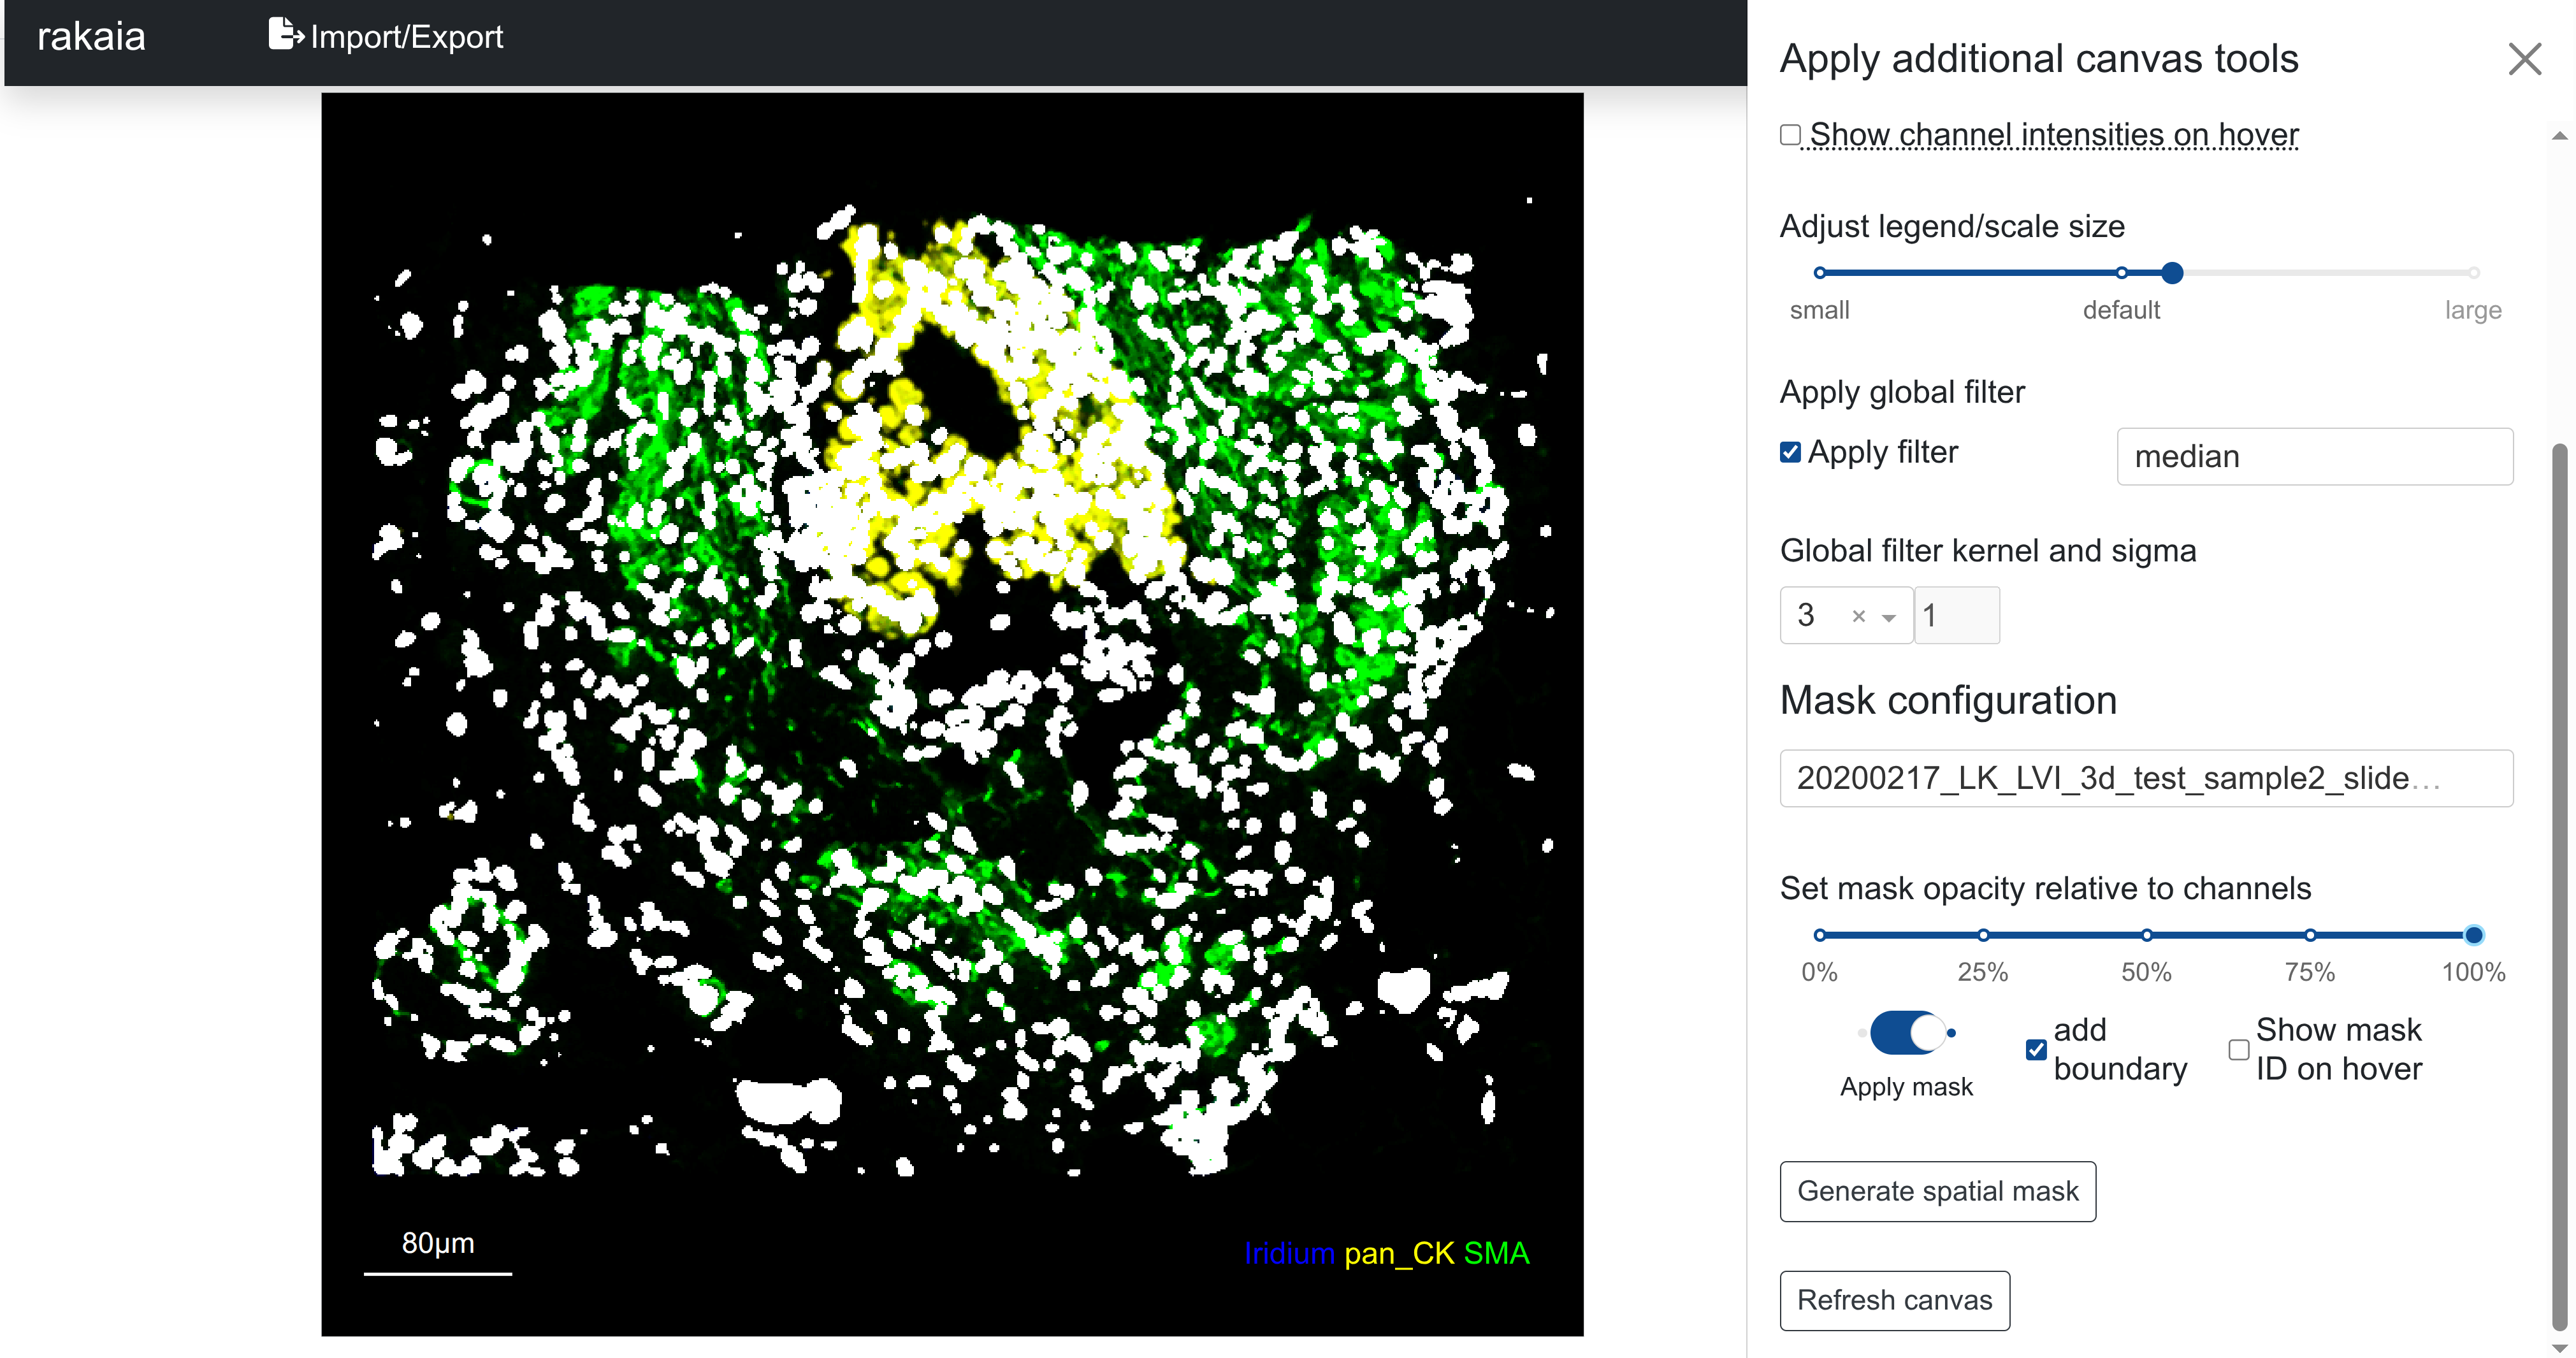
In the second image of the same region, the opacity is set to 100, and the objects appear fully white over the channels:
The opacity of the mask relative to the blend is a visual preference; a general suggestion is that if the user wishes to indicate where segmentation objects lie relative to visible channel signal, opacity between 0-30 is recommended. For showing mask fill projections (see below), a fill of 80-100 is recommended.
Mask matching heuristics
Users often import multiple ROIs into one session, and rakaia provides controls to efficiently switch between ROIs while retaining the current blend parameters. In situations where multiple masks are imported, rakaia will attempt to match the current ROI name to a mask name with exact or partial matching. For example, the following names will automatch:
- ROI name:
acquisition_1 - Example corresponding mask filenames:
acquisition_1.tifforacquisition_1_mask.tiff, among others
If any part of the ROI name matches to a string portion of one of the mask names, the mask will be auto-selected into the mask dropdown selection on ROI selection. This allows users to rapidly switch through multiple ROIs with matching segmentation masks provided that the naming scheme above is observed. Note that the same dimension matching procedure will occur as outlined above, and incompatible masks will not be overlaid.
The mask naming convention for the steinbock pipeline is also compatible.
Mask names that are properly aligned to the ROI names, as above, are required to effectively merge any annotations associated with quantified objects (i.e. single cell quantification) into matched tabular intensity data for export. This article provides more information on merging.
In order to assist the naming alignment, rakaia will show a modal popup on the upload of a single mask. The modal will allow the user to mask the mask identifier to the current ROI (if loaded):
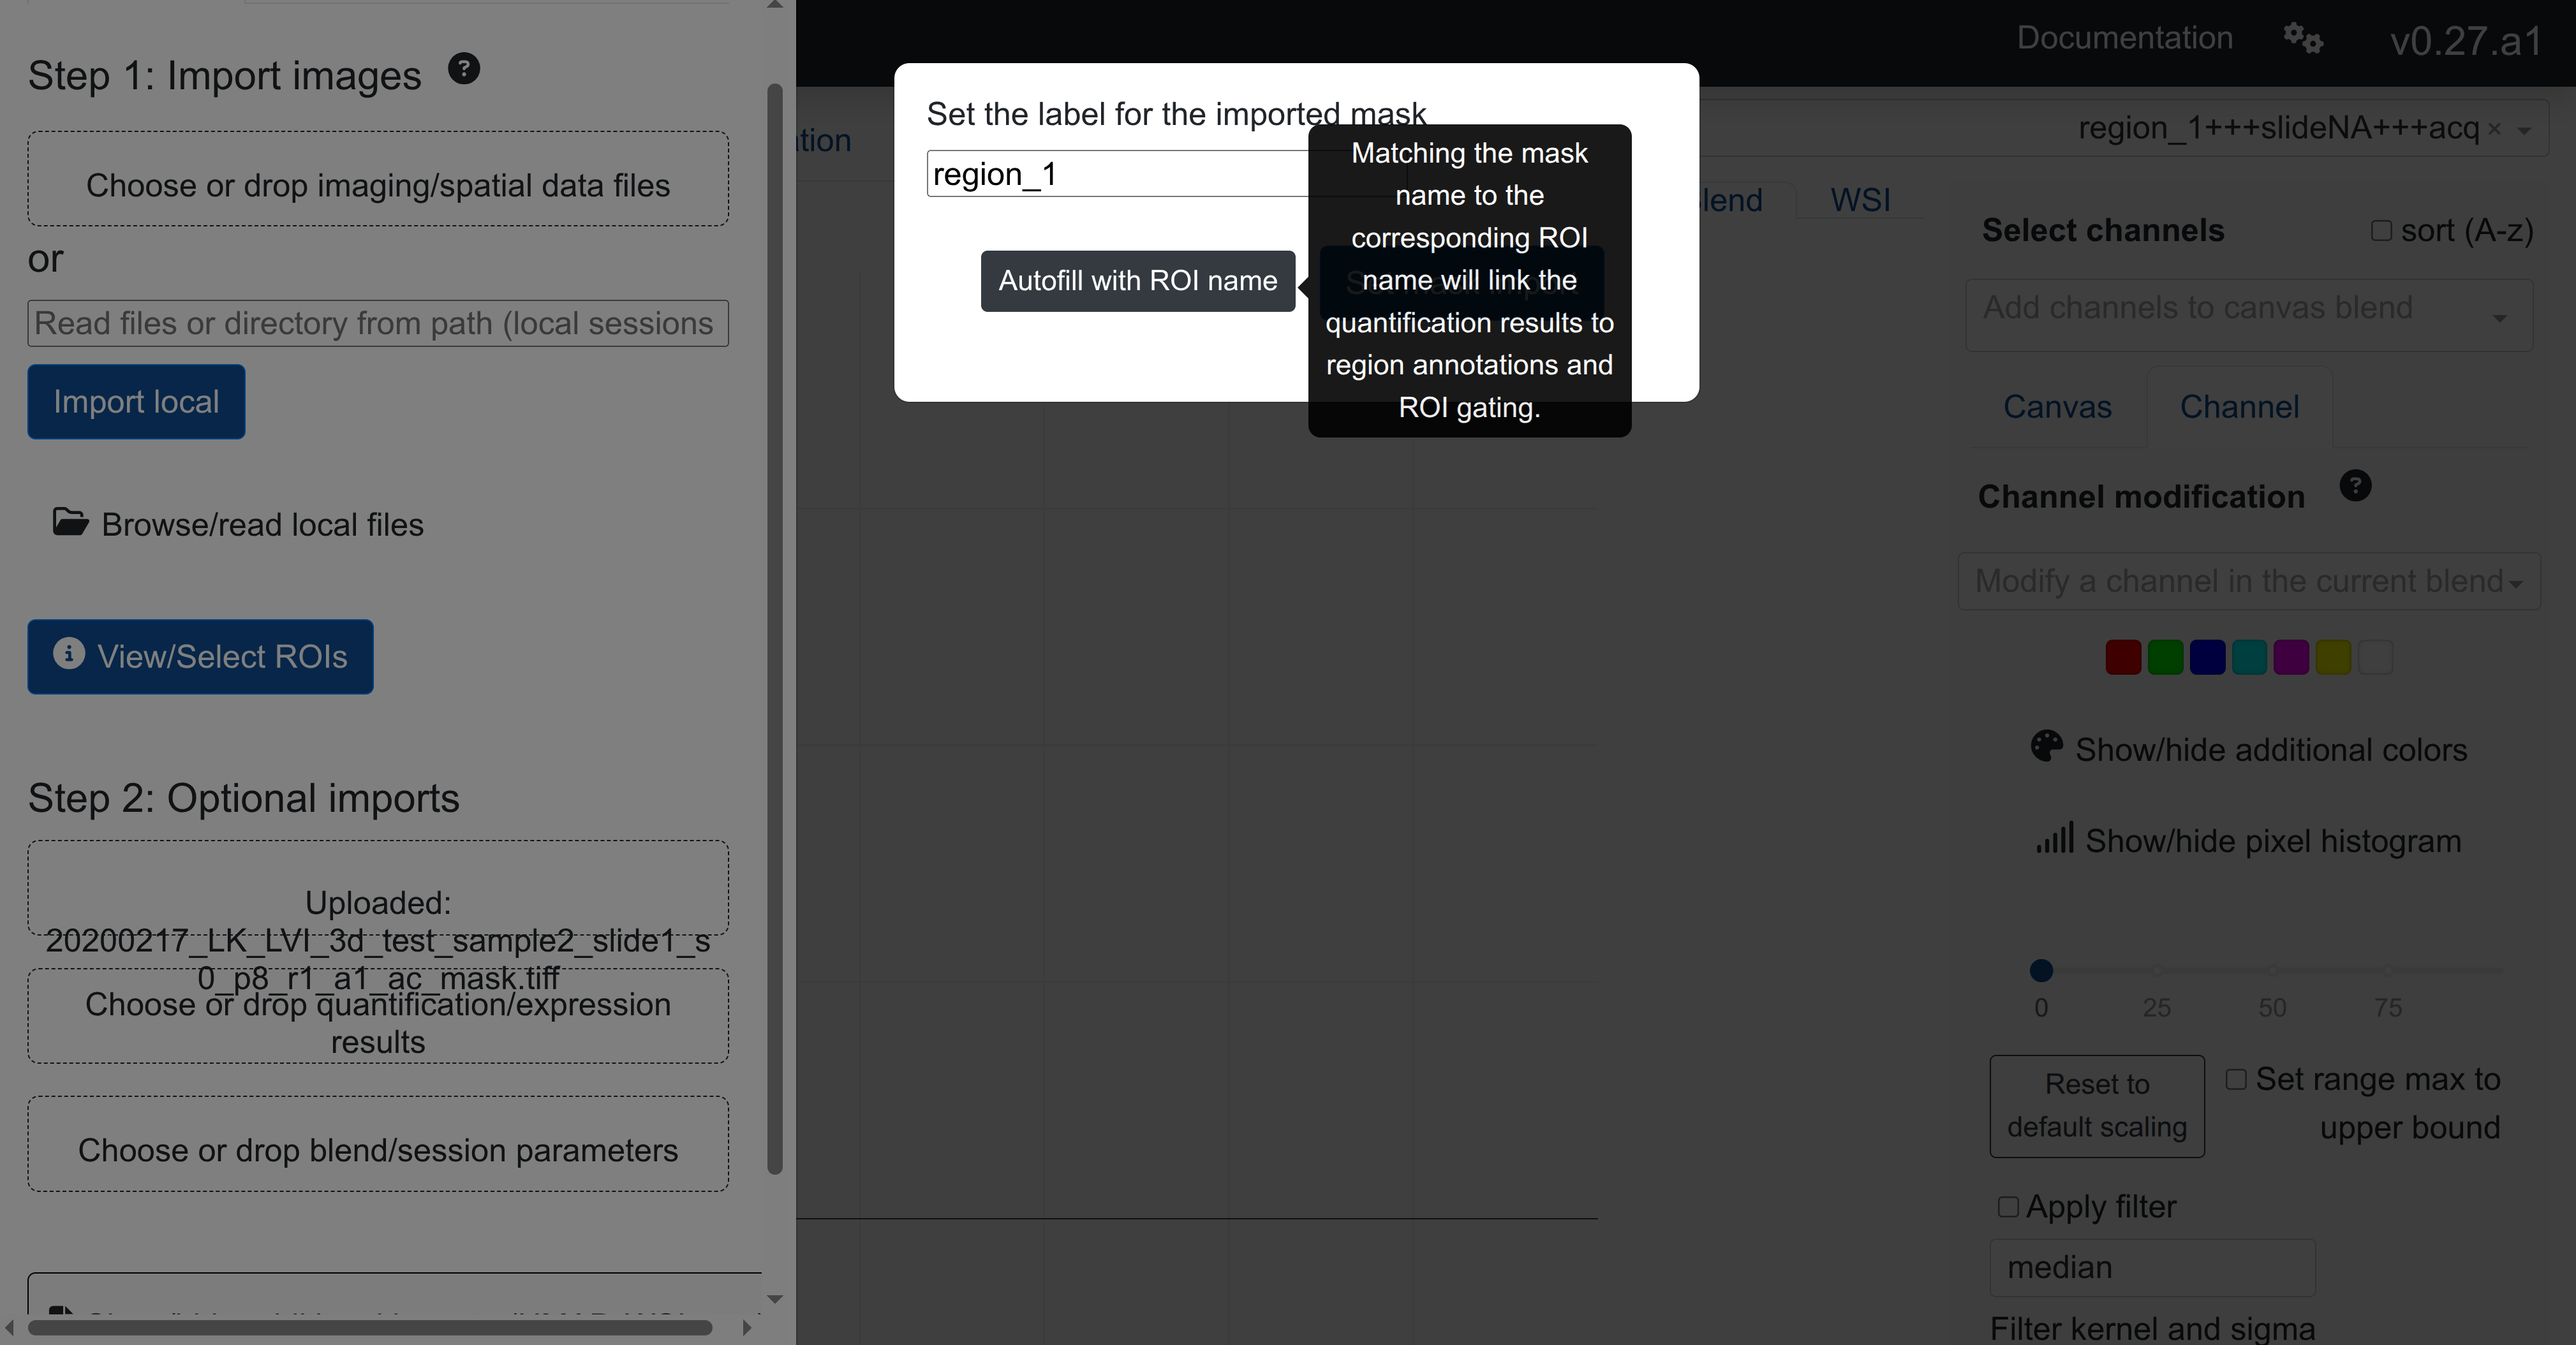
In the example above, after importing a multiplexed region named region_1 from tiff, importing the corresponding mask tiff and selecting Autofill with ROI name saves the imported mask with the same name identifier as the matched ROI.
The mask naming modal popup will only show up if a user uploads a single mask at a time. For bulk mask uploads, the mask identifier will by default be the file basename (i.e. mask_1.tiff will be saved as mask_1).
Overlay projection
rakaia supports the visualization of grouped annotated objects as a fill inside a mask, such as cell-type assignments or numerical clustering assignments mask objects. Annotations may be imported and applied from CSV under Configure, annotate, measure, & more -> Quantification/overlay -> with the drag and drop component named Import mask overlay annotations. The CSV should have the following structure:
- A column linking object mask IDs to labelled categories. rakaia accepts either
object_idorcell_idas the identifying column. This column should hold the integers for every mask object to be annotated, where every unique object in a mask gets a unique integer. - One or more additional columns for annotation. Each column will be an annotation category, such as a cluster ID (leiden, UMAP, etc.) or a cell type. These annotation columns will populate a dropdown menu so multiple annotation categories per ROI can be toggled.
An example CSV format is shown below:
object_id   cluster     cell_type
1           0           immune
2           0           immune
3           1           epithelial
In this instance, users may toggle the cluster and cell_type categories to project different annotations for the objects 1 through 3 inside of an imported mask.
Overlay annotations can be applied by toggling Apply overlay once a category is set under Select overlay category. The subtype dropdown menu combined with the color picker can be used to select the colour for the particular overlay variable (i.e. the different possible values for the overlay inside the mask). Any overlay variable can have its colour changed and reflected in the mask projection.

Setting the appropriate mask opacity level will help to create a visually informative when mask overlay projection is used. It is recommended to set the opacity relative high (80-100) so that the mask fill is visible relative to the channels underneath (the image shown above uses an opacity of 100). See the appearance paragraph above for more information.
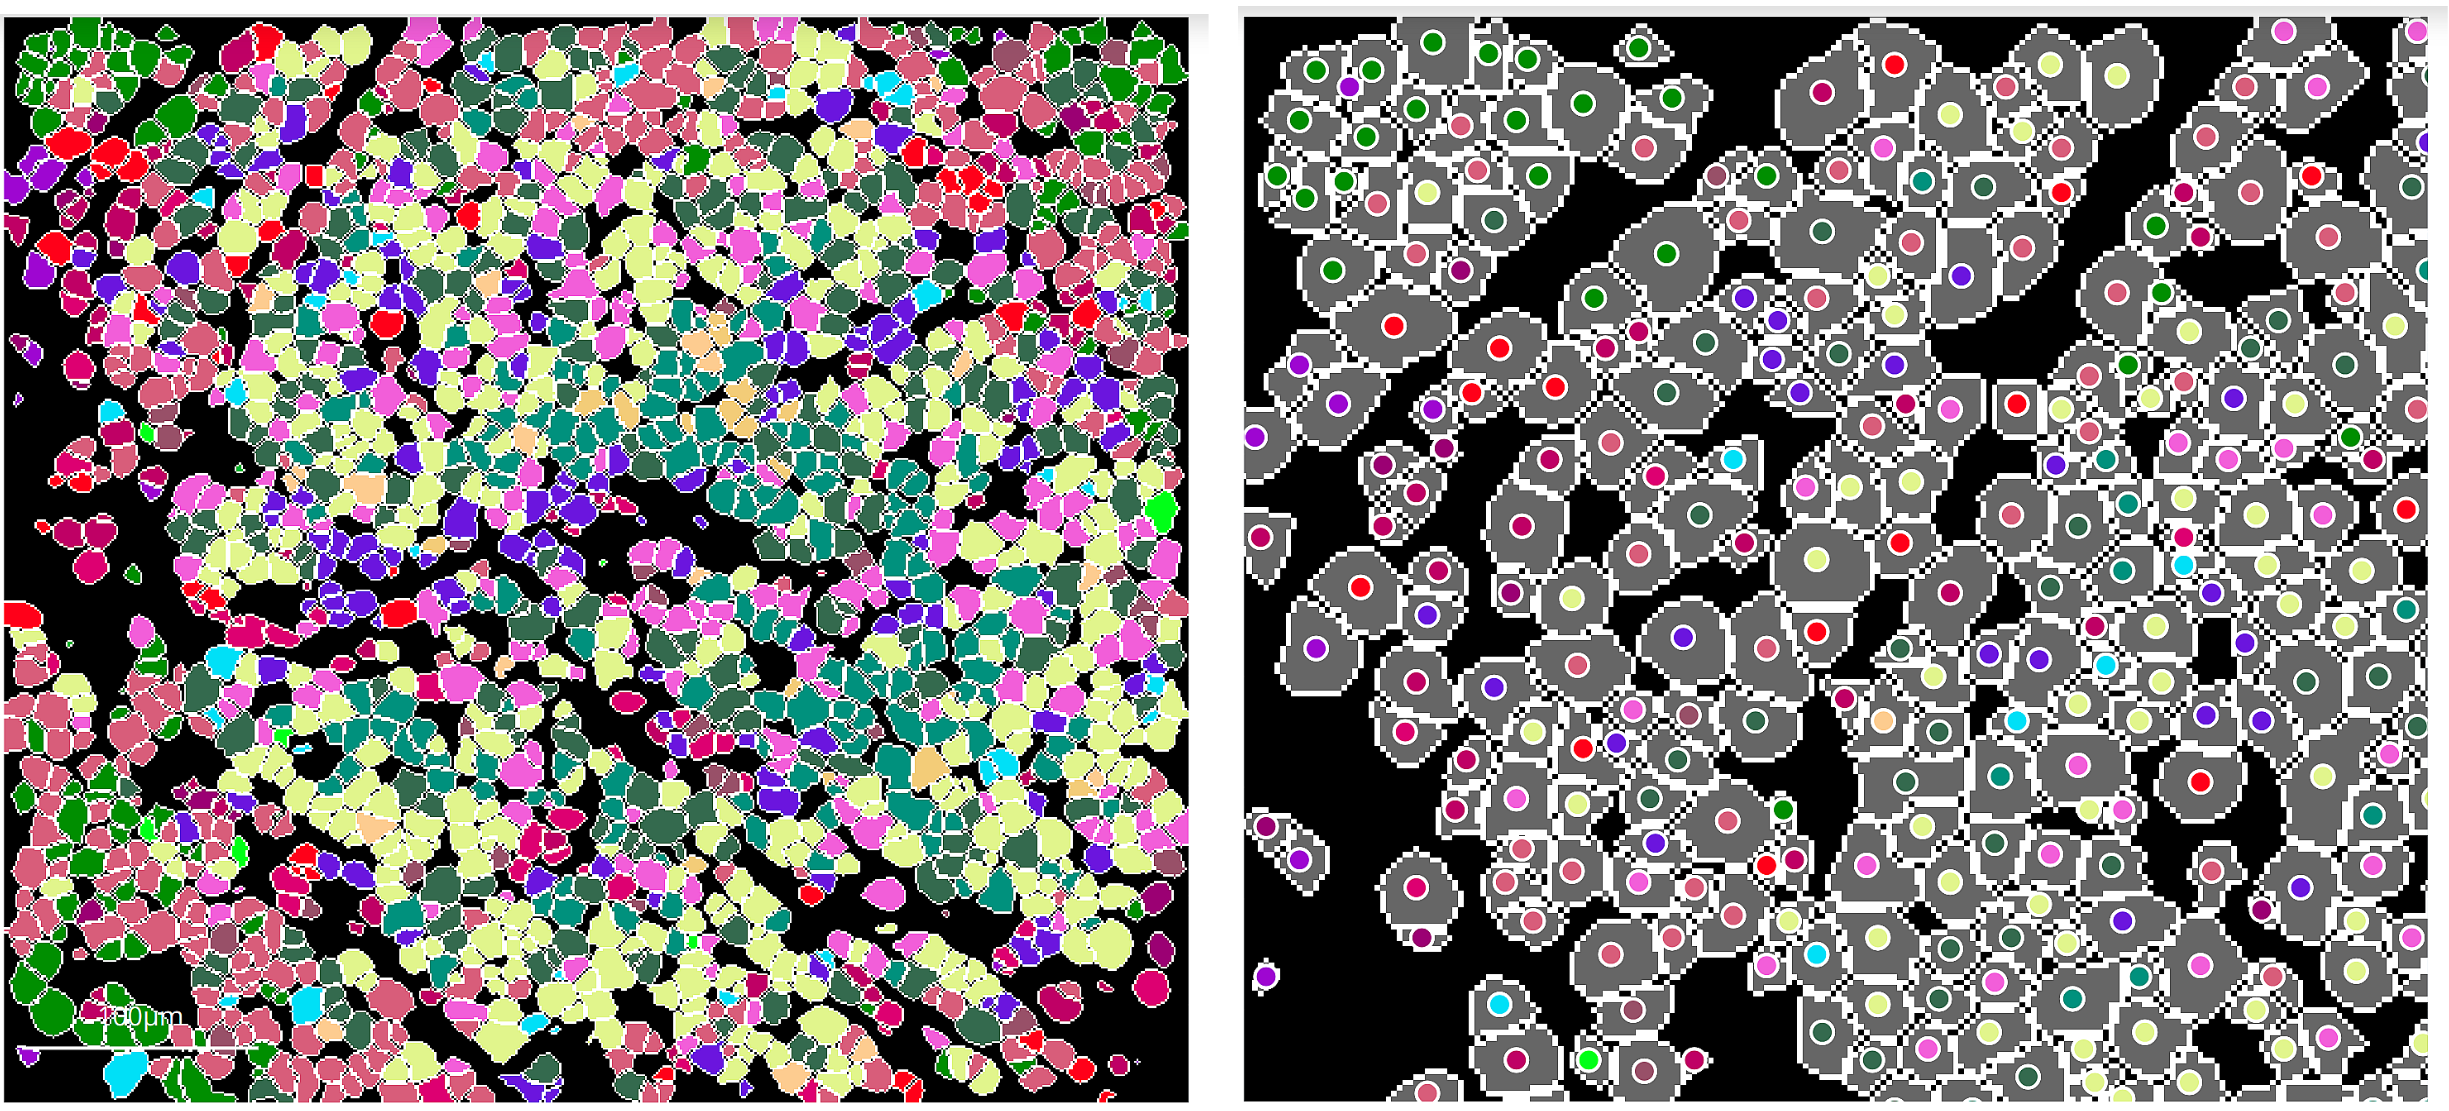
By default, the overlay annotation will be shown inside each object of the mask (when applied), as shown on the left, or it can be toggled
to circles to add a small circle at the centroid of every mask object:
It is important to note that the overlay will be projected on top of any underlying channels in the blend, so coloured channels may interfere with the full visibility of the overlay variables. If the user wishes to visualize just the clusters and no underlying channels, a single channel can be selected and both bounds set to 0, so the channel is functionally invisible. The mask can then be applied and the canvas will show only the mask and its desired opacity level, in addition to the cluster labels if applied. Selecting the channel and making it "blank" is necessary for this step as the mask cannot be applied to the canvas if the blend is blank.
Note: Overlay projections require that Toggle legend be turned on in from the canvas side configuration tab.
Visit the article on quantification for more information on how to transfer quantification or annotation categories to the overlay projection inputs.
The format above describes uploading overlay annotations for just a single ROI. For multi ROI uploads, an additional column is needed to link ROI names to entries in the CSV (see below).
Overlay projection upload for multiple ROIs
In rakaia v0.23.0 or later, users can upload a CSV of overlay projections that span multiple ROIs from either multiple tiff or mcd files. In order for rakaia to successfully map entries in the CSV across multiple ROIs, the CSV must contain EITHER a description or roi column (the identifying column). The values in the identifying column can be as follows:
-
For tiff files, the column should have the base filename for the tiff to target. So for example,
roi1_fullstack.tiffwill have rows withroi1_fullstack -
For mcd files, the format should be
{mcd file basename}_{acquisition_id}for each ROI. SO for example, the ROI inpatient1.mcdwith ROI index/id #3 would bepatient1_003. Note that this naming scheme follows thesteinbockpipeline naming conventions, which is used to process raw MCD files.
Overlay projection for Anndata-backed ROIs
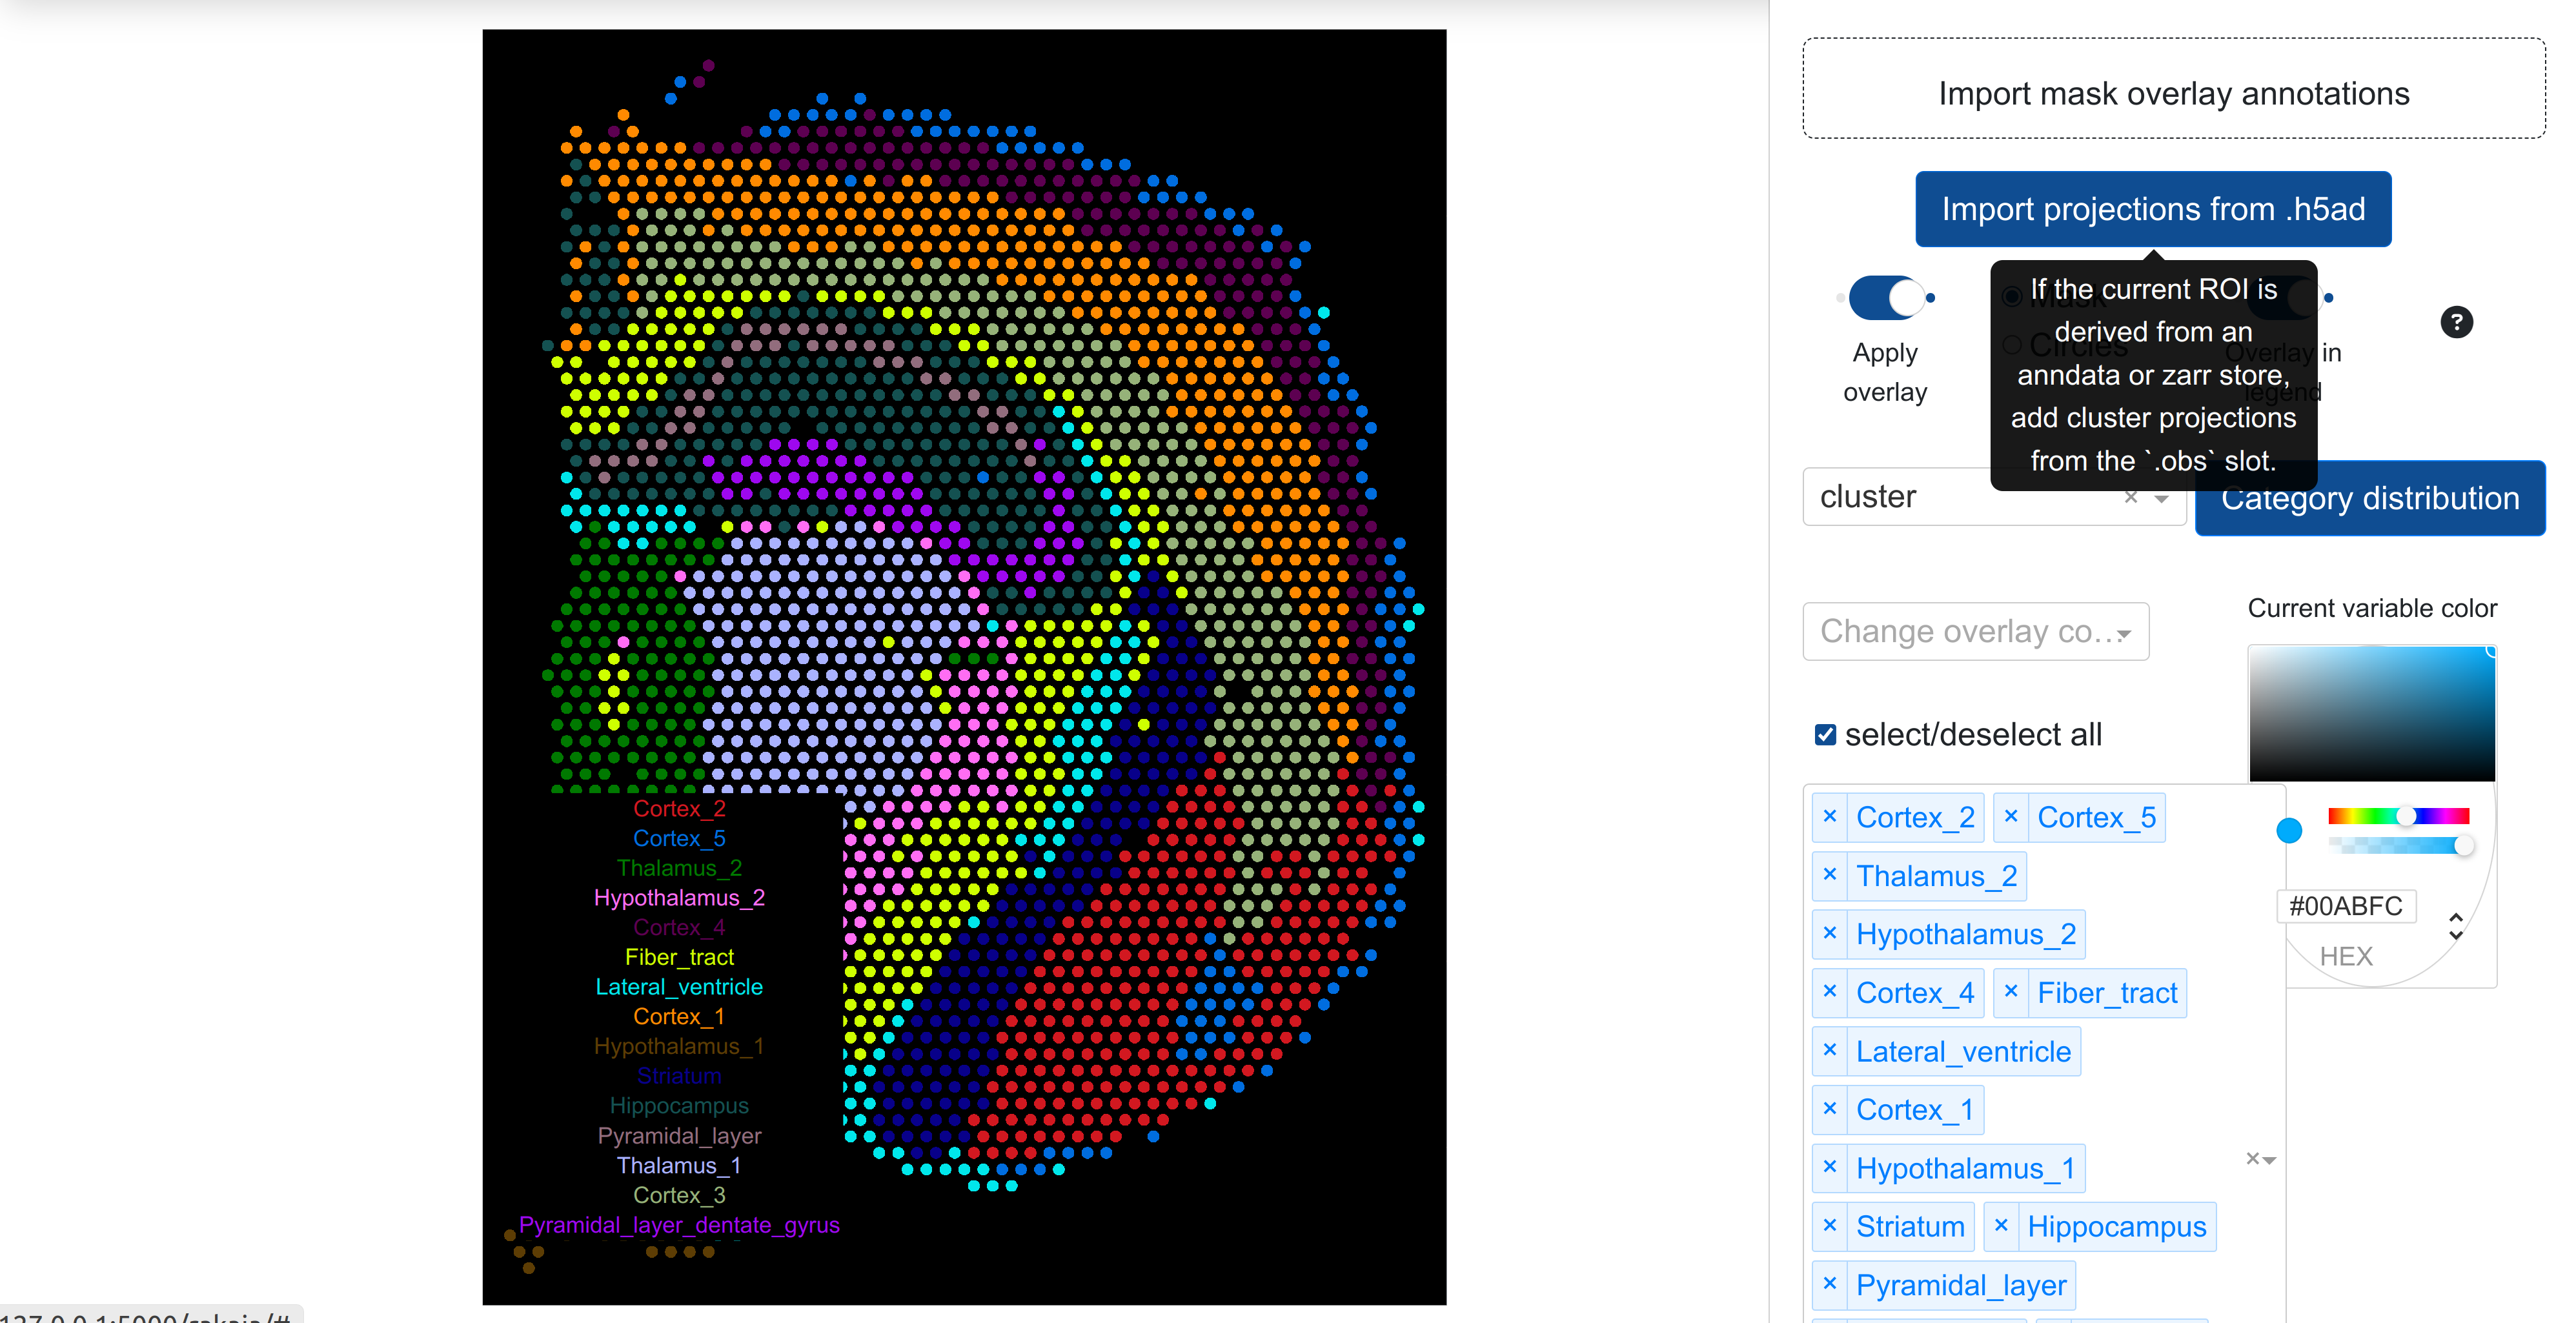
Starting in rakaia v0.25.0, the categorical variables held in the obs slot of Anndata-backed ROIs from either .h5ad files or zarr stores can be applied as an overlay projection. With the relevant ROI loaded, users should select Measure/overlay -> Import projections from .h5ad. Any categorical variables detected in the Anndata obs slot with fewer than 100 unique values will populate the overlay category dropdown as a selectable overlay.
This feature is available only for spatial datasets with a specific Anndata-type format. Visit the article on spatial data for more information on the format required.
The example shown below uses a mask opacity of 100 to make the cell type assignments as bright as possible relative to the transcripts underneath. Review opacity above for more information on setting the appearance of a mask.